Optional tools:
3DS Max .VTF texture import plugin needlink
Using VTF2TGA
Create a folder somewhere permanent, and copy all of the SBEP textures into it off of the SVN.
Delete all .VMT files, you don't need them.
Place all VTF2TGA files inside the folder with the textures and run the batch file. When prompted, select "y" to delete the original textures.
You will now have a number of .TGA files that you can use in 3ds to apply to your models. Success! You will now use this folder and it's contents when creating SBEP models.
You can now delete VTF2TGA and all of it's associated files from your material folder.
Creating a material library in 3DS
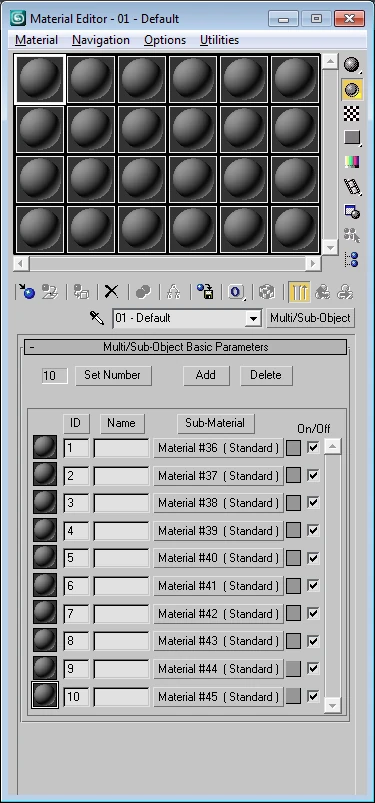
The material editor
While in 3DS Max, use the Material Editor hotkey (M) to bring up the Material editor. Select any of the empty material slots (the first is most convenient), and click the button that says "Standard", just to the right of the center above the basic parameter menu. In the window that appears, select "Multi/Sub-Object", and then select "Discard old material?". The list of spheres that is now visible will be your primary material library. You can now just drag and drop your .TGA texture files onto the sub-material button of each texture slot to fill out your library, and the buttons above, add and subtract, will, obviously enough, create and remove extra slots if you run out of space.
Setting up a basic UV
UVW modifier
Once your model is complete and in editable mesh mode, select the modifier drop down list, and chose "UVW Map". Choose the "Box" option. Once you have a few materials on your model, you will go back and forth between applying materials and re-UVing either the entire
UVW Options
model, or individual polys of the model, since you can apply UV's on a per-model or per-poly basis.
Applying materials to your model
When you've got a basic box UV map applied to the model, re-convert it to editable mesh, and apply a texture, any texture, to the entire model. After that's done, select individual polygons and drag-and-drop textures from your material library onto the selected polygons. As stated before, chances are you will be going back and forth between applying materials and applying fresh UVs.
Final tweaks
Once everything is looking proper, finalize your UVs, make final adjustments, and convert it to editable mesh once more to fully apply the modifier.
NOTES
If at first you don't succeed, keep messing with it. You can't break your mesh by applying materials and UVs, so no matter how badly you screw up, as long as you don't delete anything you will retain your base model.
If, for some reason, you decide that you want to completely clean your mesh of all textures applied to it, select the mesh you'd like to clear, click in the little pinkish red text input box in the very bottom left of your screen, input "$.material = NULL", and press Enter. This will not clear UVs applied to it, only textures. Useful if you want to make a model completely gray for a render.